Board to Bonsai Tray
To convert the old surfboard, I used:
- Fiberglass repair kit
- Builders bog
- Sandstone paint
- Casting resin
- Stain/tint for resin
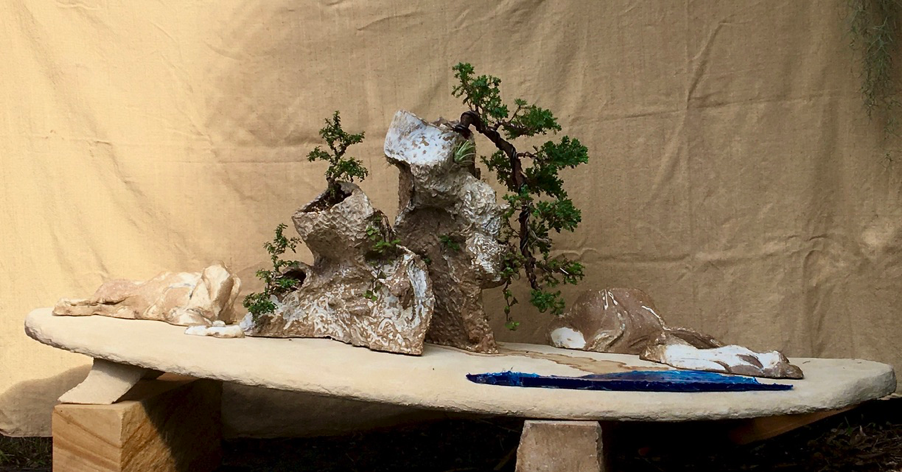
As mentioned in the June 2020 newsletter, I wanted to convert an old surfboard for use as a base for the landscape. I did this for several reasons. First, I have seen this done before and liked the idea. Second, I found an old surfboard in a Council Clean-up. Third, I wanted to evoke the coast and thought a surfboard appropriate. I began by laying out the landscape to get an idea of where everything would be placed. This allowed me to determine the final shape and size of the base I wanted.
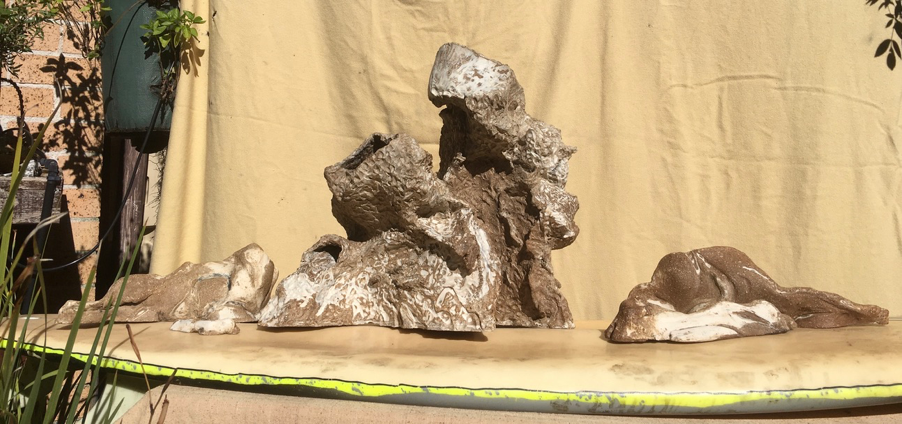
On laying things out, I noticed that the centre ridge of the surfboard made the surface uneven and prevented my ceramic rocks from sitting flat therefore it needed to be filled in. While recognisable, I didn’t want the base to just look like a covered surfboard as that would take away from the landscape aesthetic so I decided to remove both board ends. This broke the surfboard shape, allowed for removal of the most curved parts of the board and removed one of the fins. I then cut down the two remaining fins to provide a stable base.

Next, I roughed up the surface of the board to get a better adhesion. I resealed the cut ends with fiberglass to keep it waterproof. After allowing it to dry overnight, I started filling in the hollows with builder’s bog. I needed 2 large tins of bog to flatten the top surface and cover over the sharp cut ends.

I applied the bog in several layers, plaining and sanding back, to level and smooth. At the same time, I left a depression at the front corner of the deck to eventually fill with transparent blue resin evoking a bay.

Once I had the base suitably flat, I started applying sandstone paint (largely sand mixed with a fixer). It took several coats and a couple of tins of paint to get the coverage and smoothness I was after.
The last thing I tried was the resin casting to create the illusion of the water’s edge. To do this I built up a temporary wall around the edge of the board where I wanted the water to go. I then created a sealed area to cast by lining the wall and hollowed out depression in corner of the board with plastic wrap. I mixed the casting resin with a bit of blue colour and then added the hardener. Finally, I poured the cast. I apparently added too little hardener as what was supposed to harden in a couple of hours took about a week.
Once hardened, I lifted the plastic wrap from the board, checked that it was fully dry and peeled off as much of the plastic film mould as possible. As my mould wasn’t perfect and a bit of the casting solution leaked through my mould, I needed to clean up the edge of the board with a bit more sandstone paint. I am also planning on trimming back and sanding the edge of the casting to give it a more finished look. As the water draining from the planter has left a stain, I am planning to recoat and reseal the board one more time before more permanently affixing the resin ‘bay’.